
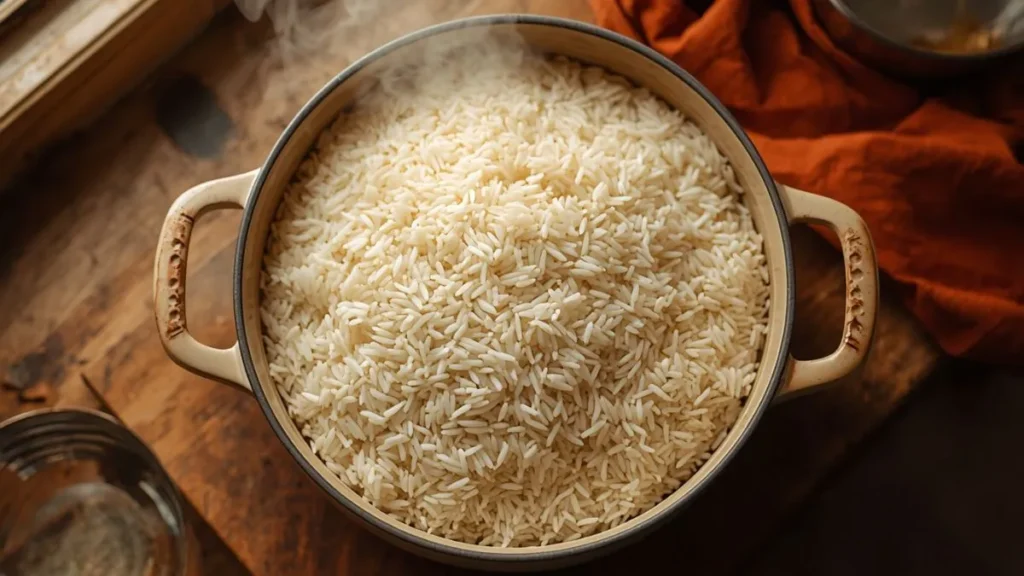
Rice turning out mushy is one of the most common frustrations in the kitchen — and it almost always comes down to two things: too much water, or too much heat for too long. The good news is that mushy rice is completely preventable once you understand what goes wrong, and even already-mushy rice can be rescued or repurposed into something delicious.
Why Does My Rice Become Mushy? (The Real Cause)
Mushy rice happens when the grains absorb more water than their starch structure can hold. When excess moisture enters the grain, the outer walls split open and release interior starch into the cooking liquid. This creates that sticky, gloopy, waterlogged texture instead of separate, fluffy grains. The two most common triggers are using the wrong water-to-rice ratio and cooking on heat that is too high for too long.
Understanding this mechanism is the first step. Once you know why it happens, every tip in this article will make complete sense.
Why Is My Rice Mushy Every Time But Not Always Overcooked?
If your rice keeps turning out mushy even when you follow the same method, the likely culprit is the type of rice you are using — not your technique. New-crop rice contains significantly more natural moisture than aged basmati rice. If you apply the same water ratio and soaking time to a new rice bag that you normally use for aged basmati, it will turn out soft and sticky every single time.
I made this exact mistake for months. I bought a new bag of rice, used my usual method, and kept blaming myself. The rice had changed — I hadn’t.
Another common cause: rinsing releases surface starch, but if rice is over-soaked, it pre-absorbs too much water before cooking even begins, leaving less room for the correct absorption during cooking.
Why Is My Rice Mushy and Hard at the Same Time?
This is one of the most confusing rice problems — and the most common question in search results. The answer is uneven heat distribution. When the pot is too small, the rice at the bottom sits in pooled water and overcooks into mush, while the rice on top receives only dry steam and stays undercooked and hard or crunchy.
The fix is simple: always use a pot that is at least twice the volume of your dry rice, and keep the heat at a steady low during the steam-cook (dam) phase. This allows heat to travel evenly through all the layers.
If you’ve already ended up with rice that is both mushy and hard, do not stir it. Transfer it gently to a wider pot, cover with a dry kitchen towel under the lid, and give it 5 more minutes on the lowest heat setting. The towel absorbs excess steam from the mushy bottom while the dry heat finishes the hard top.
For more on fixing unevenly cooked rice, my article on how to fix undercooked rice fast covers the hard-centre problem in detail.
Different Types of Rice: Why Every Variety Behaves Differently
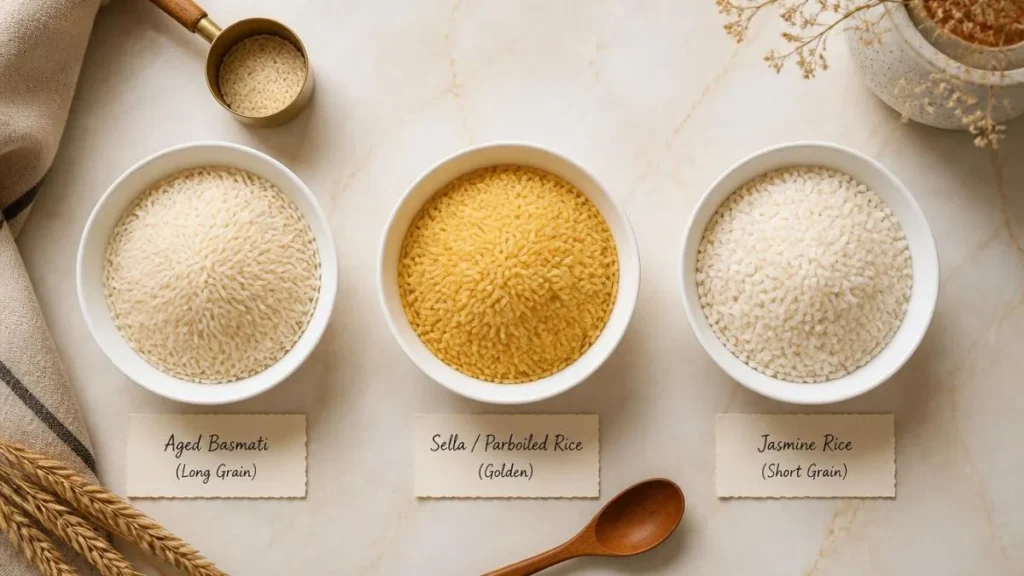
Not all rice is the same — and treating it as if it were is the single biggest cause of mushy rice in home kitchens. Each variety has a different starch content, moisture level, and grain structure. Here is what you need to know:
Aged Basmati Rice This is the gold standard for fluffy, separate grains with a beautiful fragrance. Because it is dried and aged, it can absorb more water during cooking without turning soft. Always soak aged basmati for 20 to 30 minutes before cooking — this allows the grain to expand to its full length rather than splitting under heat pressure.
New-Crop Rice New rice is harvested recently and already contains higher natural moisture. It needs very little extra water and almost no soaking time — 5 minutes maximum, or none at all. Applying aged basmati rules to new rice is a guaranteed path to mush.
Sella / Parboiled Rice Parboiled rice is partially pre-cooked during processing, making it extremely firm and resistant to breaking. It needs a longer soak of 1 to 2 hours before cooking to soften the grain adequately. This is the rice used for biryani and zarda because it holds its structure beautifully under long cooking. For a stunning biryani recipe, see my Restaurant-Style Butter Chicken Biryani.
Jasmine Rice Popular in American kitchens, jasmine rice is a softer, slightly sticky variety by nature. It requires less water than basmati — typically a 1:1.25 ratio — and should not be soaked. Over-soaking jasmine rice almost always leads to a mushy result. For full guidance, visit my dedicated guide on how much water for jasmine rice.
The Correct Water-to-Rice Ratio: The Golden Rule
The water-to-rice ratio is the single most important factor in preventing mushy rice. Using too much water is more dangerous than using too little — undercooked rice can always be fixed with a few more minutes of steam; overcooked, mushy rice cannot be easily reversed.
| Rice Type | Soaking Time | Water Ratio (Stovetop) | Notes |
|---|---|---|---|
| Aged Basmati | 20–30 minutes | 1 cup rice : 1.5 cups water | Pulao/tadka method |
| New-Crop Rice | None (or 5 min max) | 1 cup rice : 1.25 cups water | Reduce water further if humid day |
| Sella/Parboiled | 1–2 hours | 1 cup rice : 1.75 cups water | For biryani use |
| Jasmine Rice | None | 1 cup rice : 1.25 cups water | US standard white rice |
| Brown Rice | None | 1 cup rice : 2 cups water | Longer cook time needed |
For an interactive, adjustable guide to water ratios, use my Online Rice to Water Ratio Calculator — it adjusts for rice type, quantity, and cooking method automatically.
How to Cook Perfect White Rice (The Method That Never Fails)
Here is the stovetop absorption method I use at home. I’ve tested this more times than I can count, and when followed exactly, it produces individual, fluffy grains every time.
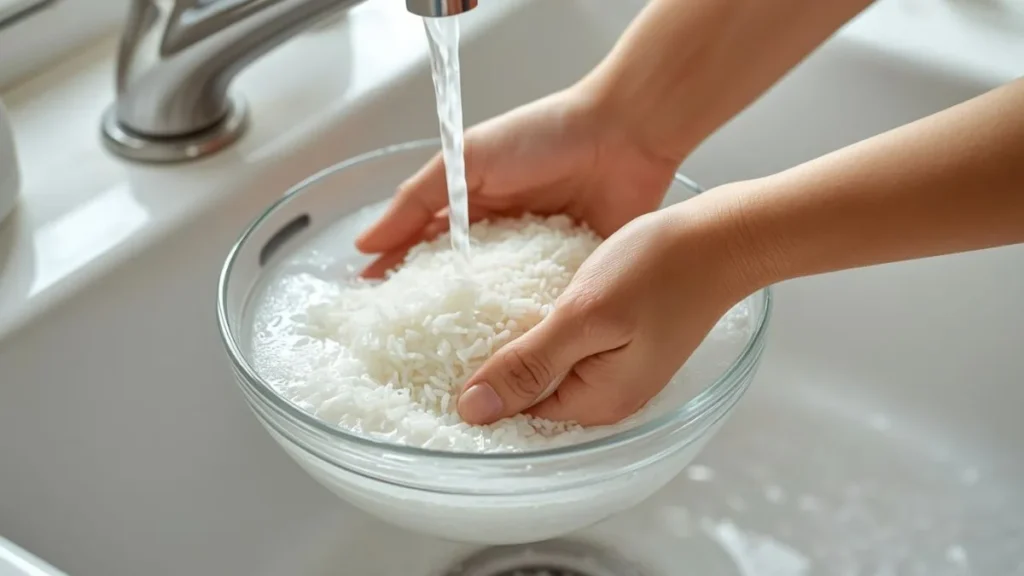
Step 1 — Wash to remove excess starch. Rinse the rice under cold running water 3 to 4 times until the water runs mostly clear. This removes the starchy residue on the surface of the grains — the residue that causes them to clump and stick during cooking. Do not skip this step.
Step 2 — Soak according to rice type. Soak the washed rice for the time appropriate to its variety (see table above). Soaking allows even moisture absorption before heat is applied, which dramatically reduces the chance of grain splitting.
Step 3 — Boil with salt before adding rice. Fill a pot with the correct measured water, bring it to a full rolling boil, and add a generous pinch of salt. Only add rice once the water is fully boiling. Adding rice to cold or lukewarm water causes it to sit in the liquid too long, absorbing too much starch-heavy water before the cooking temperature is reached.
Step 4 — Add a few drops of lemon juice or white vinegar. This is a tip I picked up after many failed pots. A few drops of lemon juice or a teaspoon of white vinegar in the boiling water keeps the grains white, firm, and separate. The mild acid interferes with starch bonding between grains. If you skip this step, especially with new-crop rice, the excess starch will glue the grains together as they cool.
Step 5 — Cook to 80% only. Do not cook the rice until it is completely done in the boiling water. Cook until the grain is just slightly firm when pressed between two fingers — about 80% cooked. This is especially important for the boil-and-drain method (used for white rice and biryani).
Step 6 — Drain the starchy water. Pour the rice through a strainer to remove all excess starchy cooking liquid. This is the step that separates truly fluffy rice from sticky rice — draining removes the dissolved starch that would otherwise coat every grain as it cools.
Step 7 — Add ghee and give it steam (dam). Return the drained rice to the pot. Drizzle one tablespoon of ghee or unsalted butter over the top. Cover the pot tightly — place a dry kitchen cloth between the pot and the lid to absorb steam — and cook on the lowest possible heat for 10 to 12 minutes. This final dam phase is where the rice finishes cooking gently in its own remaining moisture, becoming fluffy, fragrant, and perfectly separate.
Do not stir during cooking. After adding rice to boiling water, stir once gently to distribute, then leave it completely alone. Every time you stir hot rice, you break the partially cooked grains, which immediately release interior starch and create mush. Stir only once at the end, using a wide flat spatula (kafgeer), lifting from the sides and bottom rather than cutting through the middle.
For a comprehensive beginner walkthrough of the full rice cooking process, my Easy Rice Cooking for Beginners guide covers every step in detail.
Why My Rice Always Turns Out Mushy: 5 Most Common Mistakes
These are the mistakes I see most often — and made myself before I understood rice cooking properly.
Mistake 1: Measuring water by eye. Guessing water quantity is the number one cause of mushy rice. Always measure with the same cup you use to measure the rice. Consistency in the ratio matters more than the exact amount.
Mistake 2: Using a pot that is too small. Rice needs room to expand. Cramming 2 cups of rice into a small pot means the grains at the bottom are submerged in standing water while the ones on top are barely touched. Use a wide, heavy-bottomed pot — at least double the volume of the dry rice.
Mistake 3: Cooking on high heat throughout. High heat is only for bringing water to a boil. Once the rice is added, reduce to medium for the boiling phase and then to the absolute lowest setting for the steam (dam) phase. Sustained high heat pushes too much moisture into the grains too fast.
Mistake 4: Lifting the lid repeatedly. Every time the lid is lifted during cooking, steam escapes. The rice then needs more time to finish, during which it continues sitting in residual liquid and overcooks. Set the timer and trust the process.
Mistake 5: Soaking the wrong rice variety. As covered above, soaking new-crop rice or jasmine rice for the same time as aged basmati is a consistent way to end up with sticky, over-hydrated rice before cooking even begins.
How to Fix Mushy Rice (Rescue Methods That Actually Work)
This is the section the competitors focus on heavily — and for good reason. Sometimes rice turns out mushy despite your best efforts. Here is exactly what to do.
Fix 1: The Towel and Low Heat Method (For Slightly Wet Rice)
If the rice is cooked through but slightly too moist, this is the fastest fix. Remove the lid, place a dry kitchen cloth over the pot opening, replace the lid on top of the cloth, and cook on the lowest heat for another 5 minutes. The cloth absorbs the excess steam instead of letting it condense back onto the rice. This is the same principle as the dam method, and it works beautifully for rice that is just a little too wet.
Fix 2: Open-Lid Evaporation (For Visible Water in the Pot)
If there is still water pooled at the bottom of the pot after the rice is cooked, turn the heat to the lowest setting, remove the lid completely, and let it cook uncovered for 5 minutes. Do not stir. The exposed surface allows the trapped moisture to evaporate quickly. Check every 2 minutes to avoid drying the rice out too much.
Fix 3: The Refrigerator Dehydration Method (For Sticky Rice)
Spread the mushy rice in a thin, single layer across a wide baking sheet or large plate. Place it in the refrigerator uncovered for 20 to 30 minutes. The cold, dry air of the fridge pulls moisture out of the over-hydrated grains. Once the grains are dry and firm, reheat in a microwave covered with a damp paper towel in 1-minute intervals. This method works surprisingly well for slightly sticky rice.
Fix 4: The Low Oven Method (For Very Wet, Heavily Overcooked Rice)
Preheat your oven to 325°F (163°C). Line a baking sheet with parchment paper and spread the mushy rice in a layer no thicker than ⅛ inch. Place it in the oven for 5 minutes, check the texture, and give it another 5 minutes only if needed. The even, dry heat extracts moisture from the grain exterior, restoring some of their individual structure. This method works best when the rice is extremely waterlogged.
Fix 5: Repurpose It (When the Rice Is Beyond Saving)
If the grains have completely broken down and no amount of drying will restore them, repurposing is the smartest and most economical solution.
- Rice congee / khichdi: Add chicken or vegetable broth, a pinch of ginger, and simmer until creamy. This is intentionally the texture of mushy rice — and it is delicious.
- Fried rice base: Spread the mushy rice on a tray, refrigerate it overnight uncovered, and use it as the base for the next day’s fried rice. Overnight refrigeration dries it significantly. Try it with my Homemade Chicken and Shrimp Fried Rice.
- Rice pudding: Mix with whole milk, sugar, and a touch of cardamom — the soft texture is exactly what you want here.
- Soup thickener: Blend the mushy rice with a cup of broth to create a thick, creamy base for vegetable soups.
Troubleshooting Guide: What Went Wrong and How to Fix It Next Time
| Problem | Most Likely Cause | Immediate Fix | Prevention |
|---|---|---|---|
| Rice is mushy and soft | Too much water, over-soaked | Oven or fridge dehydration method | Reduce water by ¼ cup next time |
| Rice is mushy at bottom, hard on top | Pot too small, uneven heat | Wide pot, low and steady dam heat | Use pot 2x volume of dry rice |
| Rice is sticky and clumping | Excess starch not washed off, no acid or fat | Rinse under cold water | Wash rice 3–4x, add lemon/vinegar |
| Rice is watery after dam | Lid not tight, steam escaping | Kitchen cloth under lid | Use cloth-covered lid method always |
| Rice tastes bland and flat | Salt added too late or not at all | Season the cooking water | Salt the boiling water before rice goes in |
| Grains are breaking apart | Over-stirred during cooking | Cannot reverse — repurpose | Stir only once after adding rice |
Food Safety and Storage: How to Store and Reheat Cooked Rice Safely
Cooked rice is one of the most commonly mishandled foods in home kitchens. According to food safety guidelines, cooked rice must be cooled and refrigerated within 2 hours of cooking to prevent bacterial growth — specifically Bacillus cereus, a heat-resistant bacterium that thrives in cooked starchy foods left at room temperature.
Refrigerator storage: Cool the rice quickly by spreading it on a wide tray, then transfer it to an airtight container. Refrigerate for up to 3 to 4 days.
Freezer storage: Portion cooked rice into zip-lock bags or airtight containers and freeze for up to 1 month. Frozen rice reheats beautifully — add a tablespoon of water before microwaving to restore moisture.
Reheating safely: Always reheat rice until it is steaming hot all the way through — not just warm. Partially reheated rice that sits again at room temperature is not safe to eat.
Mushy rice storage note: Mushy rice that has been spread on a tray in the fridge for dehydration should be used within 24 hours and not refrozen after reheating.
What to Eat With White Rice: Perfect Pairings
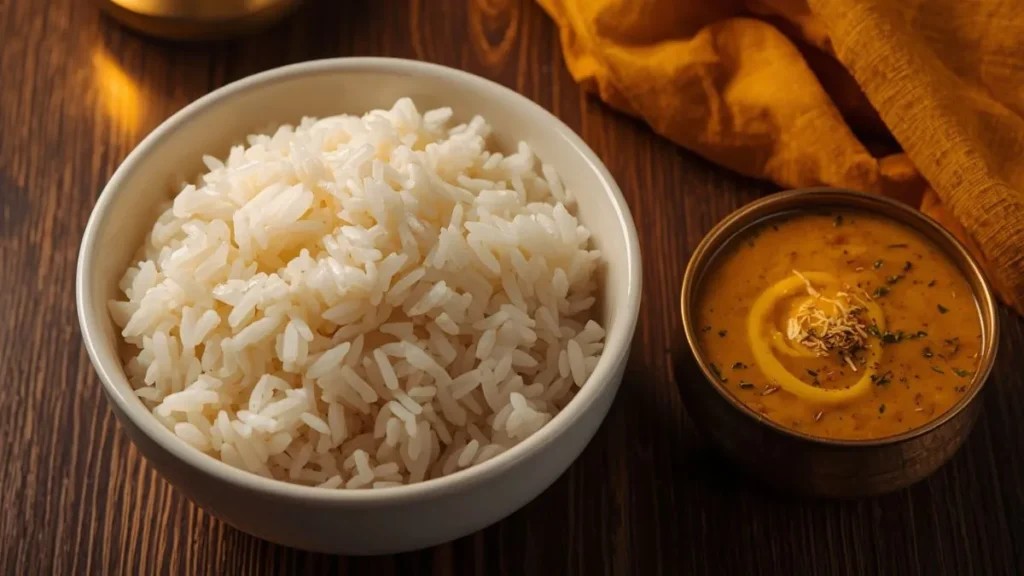
Perfectly cooked white rice is a complete meal with almost any accompaniment. Here are the pairings I reach for most often in my kitchen:
- Dal chawal — The most comforting combination in Pakistani and Indian home cooking. Hot moong masoor dal with a tadka of desi ghee ladled over white rice is the definition of comfort food.
- Kadhi chawal — Tangy, pakora-filled kadhi over fluffy white rice is a timeless classic.
- Aloo gosht or chicken gravy — The thin, flavoured gravy from any curry soaks beautifully into separate, fluffy rice grains.
- Raita and salad — For a light meal, a bowl of mint raita with fresh salad alongside plain white rice is both satisfying and easy on the stomach.
White boiled rice is also the most digestible form of rice, making it suitable for children, the elderly, and anyone recovering from a stomach upset.
If you want to try a completely different rice texture, my guide on How to Cook Sticky Rice on Stove shows you how to intentionally achieve that soft, clinging texture for specific dishes — the opposite of everything we’ve worked toward here, and equally useful to know.
Have you turned a pot of rice into mush and rescued it? Or do you have a tip that always saves the day? Share your experience in the comments below — I read every single one.
Frequently Asked Questions
Why is my rice mushy every time I cook it?
If your rice turns out mushy every time, the most likely cause is too much water combined with the wrong soaking time for the type of rice you are using. New-crop rice already contains more natural moisture and needs very little extra water — applying aged basmati rules to it will produce mushy results consistently. Measure your water precisely and identify your rice variety before cooking.
Why is my rice mushy and hard at the same time?
This happens when heat is distributed unevenly — typically because the pot is too small. The rice at the bottom sits in standing water and overcooks into mush, while the rice on top receives only dry steam and stays undercooked and crunchy. Use a wider, heavier pot that is at least twice the volume of your dry rice, and keep the heat at the lowest possible setting during the dam (steam) phase.
Why is my rice mushy and crunchy at the same time?
Mushy-and-crunchy rice is a sign that the cooking temperature was too high throughout. High heat forces water absorption too fast at the point of contact (bottom and sides of the pot), while the interior of the rice pile does not receive even heat. Bring the water to a boil, add rice, then immediately reduce to medium, and reduce again to the lowest setting once the surface water is absorbed.
How do I fix mushy, already-cooked rice?
If your rice is slightly too wet, place a dry kitchen cloth under the lid and cook on the lowest heat for 5 more minutes. For stickier rice, spread it on a tray and refrigerate uncovered for 20 to 30 minutes. For very waterlogged rice, bake it in a 325°F (163°C) oven on a parchment-lined tray for 5 to 10 minutes. If the grains have fully broken down, repurpose the rice into congee, fried rice base, or rice pudding.
How much water should I use to prevent mushy rice?
For aged basmati rice, use 1.5 cups of water per 1 cup of rice. For new-crop or jasmine rice, reduce to 1.25 cups per cup of rice. For sella/parboiled rice (biryani rice), use 1.75 cups per cup after a 1- to 2-hour soak. Always measure with the same cup used for the rice. Use my Online Rice-to-Water Ratio Calculator for automatic adjustments based on rice type and quantity.
Does washing rice prevent it from becoming mushy?
Yes — washing rice 3 to 4 times under cold water until the water runs clear removes the surface starchy residue that causes grains to clump and stick together during cooking. Unwashed rice releases significantly more starch into the cooking water, which coats every grain and creates a gummy, mushy texture. Washing is the easiest step to immediately improve your rice’s texture.
Can mushy rice be saved and eaten the next day?
Yes. Spread the mushy rice thinly on a tray and refrigerate it uncovered overnight. The cold, dry air removes a significant amount of moisture, and the chilled, slightly dried rice becomes an excellent base for fried rice the next morning. Alternatively, mix it with milk, sugar, and cardamom for a simple rice pudding. Always store cooked rice in the refrigerator within 2 hours of cooking and consume within 3 to 4 days.
Perfect Fluffy White Rice
(Stovetop Dam Method)
Ingredients
- 1 cup aged basmati rice
- 1½ cups cold water (absorption) or 3 cups for boil-drain
- 1 tsp salt
- 1 tbsp ghee or unsalted butter
- 1 tsp lemon juice or white vinegar
Equipment
- Wide heavy-bottomed pot
- Fine mesh strainer
- Dry kitchen cloth (for dam lid)
- Flat spatula / kafgeer
- Measuring cups
Instructions
- 1Wash the RiceRinse rice under cold running water 3–4 times until water runs mostly clear. This removes surface starchy residue that causes grains to clump.
- 2Soak (20–30 min)Cover washed rice with cold water and soak for 20 to 30 minutes. This step helps grains elongate and absorb moisture evenly before heat is applied.
- 3Boil Water + Salt + LemonBring water to a full rolling boil. Add salt and lemon juice. Only add rice once the water is fully boiling — never add rice to cold water.
- 4Cook to 80%Add soaked, drained rice. Stir once gently. Cook uncovered on medium heat for 7–8 minutes until grains are just slightly firm when pressed — 80% done.
- 5Drain Starchy WaterPour rice through a fine strainer. This removes all dissolved starch from the cooking liquid — the key step that separates fluffy rice from sticky rice.
- 6Dam (Steam) with GheeReturn rice to pot. Add ghee on top. Cover with a dry cloth under the lid. Cook on the lowest possible heat for 10–12 minutes. Do not lift the lid.
- 7Rest & FluffTurn off heat. Rest 2 minutes. Fluff gently from the sides using a wide flat spatula. Serve immediately for the best separate-grain texture.
- Never stir the rice more than once during cooking — it breaks grains and releases starch instantly.
- New-crop rice needs less water (1.25 cups) and zero soaking — use aged basmati for this exact ratio.
- The dry cloth under the lid absorbs steam during dam — this is the difference between fluffy and watery rice.
- Store leftover rice in the fridge within 2 hours. Reheat with a splash of water, covered, for 1–2 minutes.